The basis of QUICOM research relies on Phase 1, during which the required techniques and software modules were defined, industrial needs were showcased by the end-users and sample specimens together with conventional NDT data were collected. After the completion of Phase 1 during the first months of the project, the work realized during Year 2 was focused on the development of the targeted technology platform. Phase 2 is divided across five (5) work packages which emphasize on the development of individual methods and techniques for different application areas, as well as their validation through a centralized software platform.
WP3 provides optimized micro-scale and meso-scale material characterizations for all WPs, including WP9 (Evaluation and Demonstration), in order to evaluate the generated results. The work related to this WP is now finalized, while additional works are further being carried out with regards to the implementation of new functionalities.
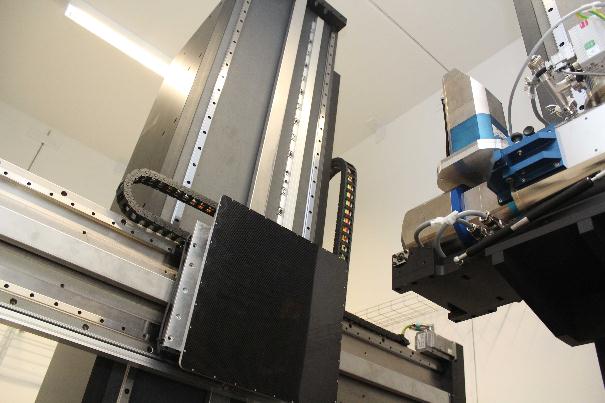
WP4 aims to develop and establish X-ray based imaging techniques for the production of integrated inspection of defects in small high volume parts; 2D and 3D x-ray imaging techniques are being investigated to quantify these defects. First activities focused on the simulation of specified test scenarios. After the first half of the project, nearly all first scans of the defined samples have been realized. The achieved results have been analyzed and discussed in detail with the end users, AIRBUS and FACC. Currently, a new flexible CT setup has been set into operation, capable of scanning larger samples and achieving higher geometrical resolution than the previously used scanners, and which will be used for future scans in WP4 and WP6. On-going studies focus on the investigation of dual and multi-energy techniques, and beam-hardening removal. Future activities will be dedicated on rescanning part of the samples with respect to the remaining limitations.

View at the vertical and horizontal detector movement axis of the recent CT setup
WP5 addresses the development of reliable methods for the inspection of composite metallic parts, CFRP parts with metallic inlays or metal fasteners. So far, simulations gave good support for the real dual energy CT (DECT) measurement and it was proven that the DECT approach allows for the identification of pores in the metal core of the CFRC specimen. Current and future work focuses on dual energy CT experiments based on a Carbon/Aluminum material decomposition.
WP6 examines the application of X-ray CT techniques to scan complex, large and thick components. First activities focused on the simulation of specified test scenarios. After the first half of the project an inventory of the completed tasks justified that almost all planned actions and scans have been realized so far, and the achieved results have been analyzed and discussed in detail with the industrial partners, AIRBUS and FACC. Activities for the remaining duration of the project include tomosynthesis scanning of several samples, as well as the rescanning of a part of samples, towards overcoming remaining limitations.
WP7 focuses on the development of algorithms for the quantitative characterization of the inner structure of composite materials, operating on the basis of the XCT data. It aims at the development of reliable and robust methods that will be used for the determination, extraction and characterization of the geometry, orientation and shape of the inner structure in CFRP, towards determining geometrical as well as material properties. Applied techniques examine the determination of surface, detection of pores, orientation of fibers, and more. The figure below shows the developed FiberScout system. This tool allows investigating and exploring 3D XCT datasets of fiber reinforced composites in a simple and fast way by which conclusions regarding the properties of the material specimen may be considered.

Overview of the FiberScout interface. Top left: 3D Renderer (with a GFRP specimen, top right:scatter plot matrix, bottom right: polar plot, bottom middle: parallel coordinates, bottom left: class explorer)
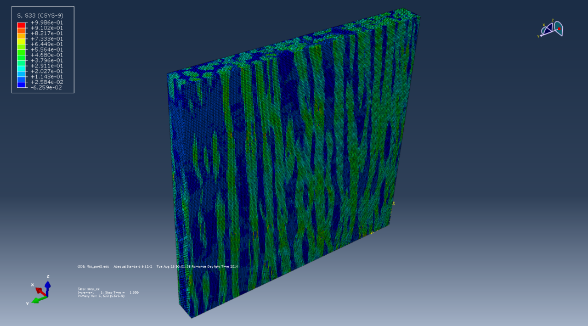
WP8 focuses on the development and/or optimization of validated CFRP models based on quantitative data analysis of the real inner structures of composite components, taking into account production flaws.

Longitudinal stresses in the finite element model of a part of the UD flax/epoxy sample
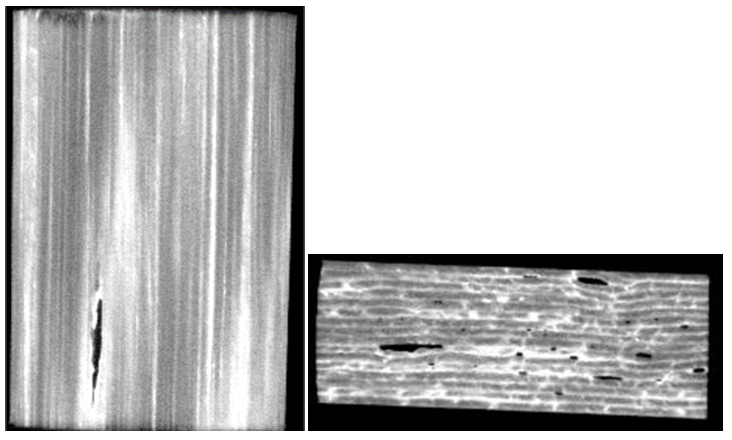
Scanned 3D images were further processed and defects were quantified with the use of the VG Studio MAX. The analysis indicated that there is no large difference between the medium and minimum porosity level in terms of volume fraction. This was already suspected while observing the results of the mechanical tests; however, the analysis provided significant information on the nature of pores and defects in unidirectional composites, which can be taken into account for micro-scale models. Future steps contain the development of models that simulate the mechanical tests which have already been conducted and validate the effectiveness of the procedure. A set of composite specimens were produced with four levels of porosity and referenced specimens with minimal porosity (cured at special curing cycles). These will be scanned on CT, as well as against other methods, for porosity evaluation and effectively validation of the developed techniques.

Images from the VG Studio MAX analysis. Front view (cut) from the internal of medium porosity sample and side view (cut) of the extensive porosity sample
Being at its final year of development, QUICOM Phase 3 has now started. This final stage includes the demonstration of the developed methods upon a typical aeronautic component (e.g. wing shells, fuselage panels or vertical tail plane) including robot based XCT, microstructure analysis of advanced composites, as well as modeling and analysis of repairs, adhesive bonding and composite parts.

